How to link Google Fonts in HTML & CSS
The only guide you'll ever need to link Google fonts to your website.

Google fonts is a font delivery service that has a massive library of available free and open-source font families to use in your projects. It's the most widely used and provides a quick copy-and-paste code that you can use in your HTML and CSS files to connect to their API and have access to particular fonts to stylize your website the way you want.
So how exactly do you integrate these amazing bodies of work into your website?
- To begin with, you need to go to the Google Fonts website. There you will get access to 1462 (as of 2022) open-source font families.
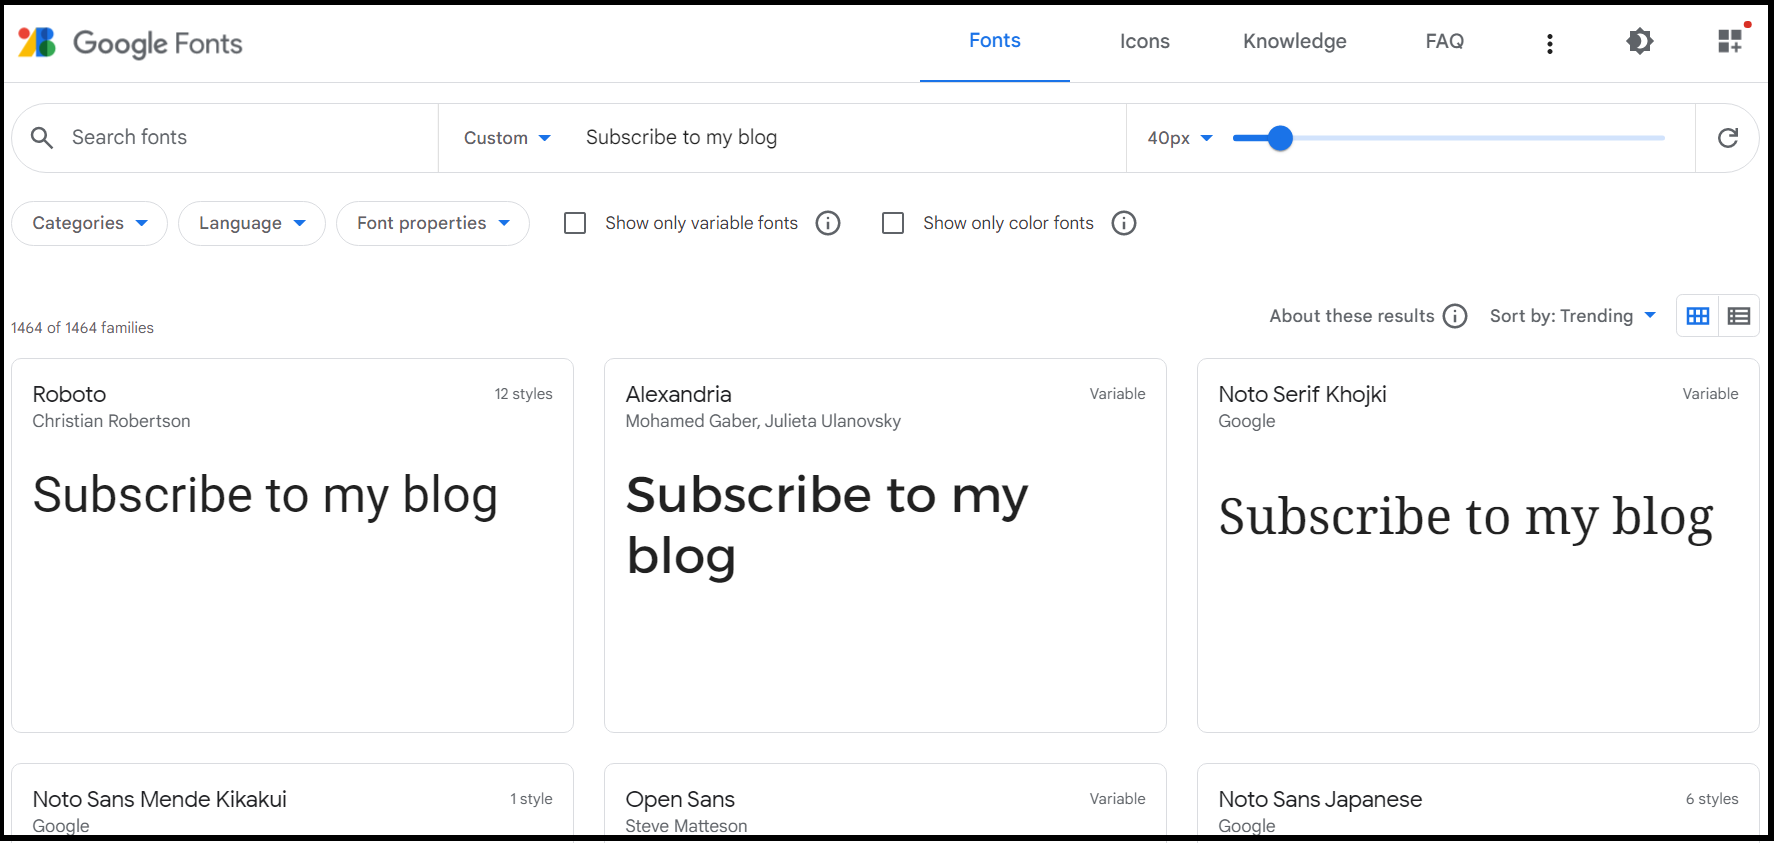
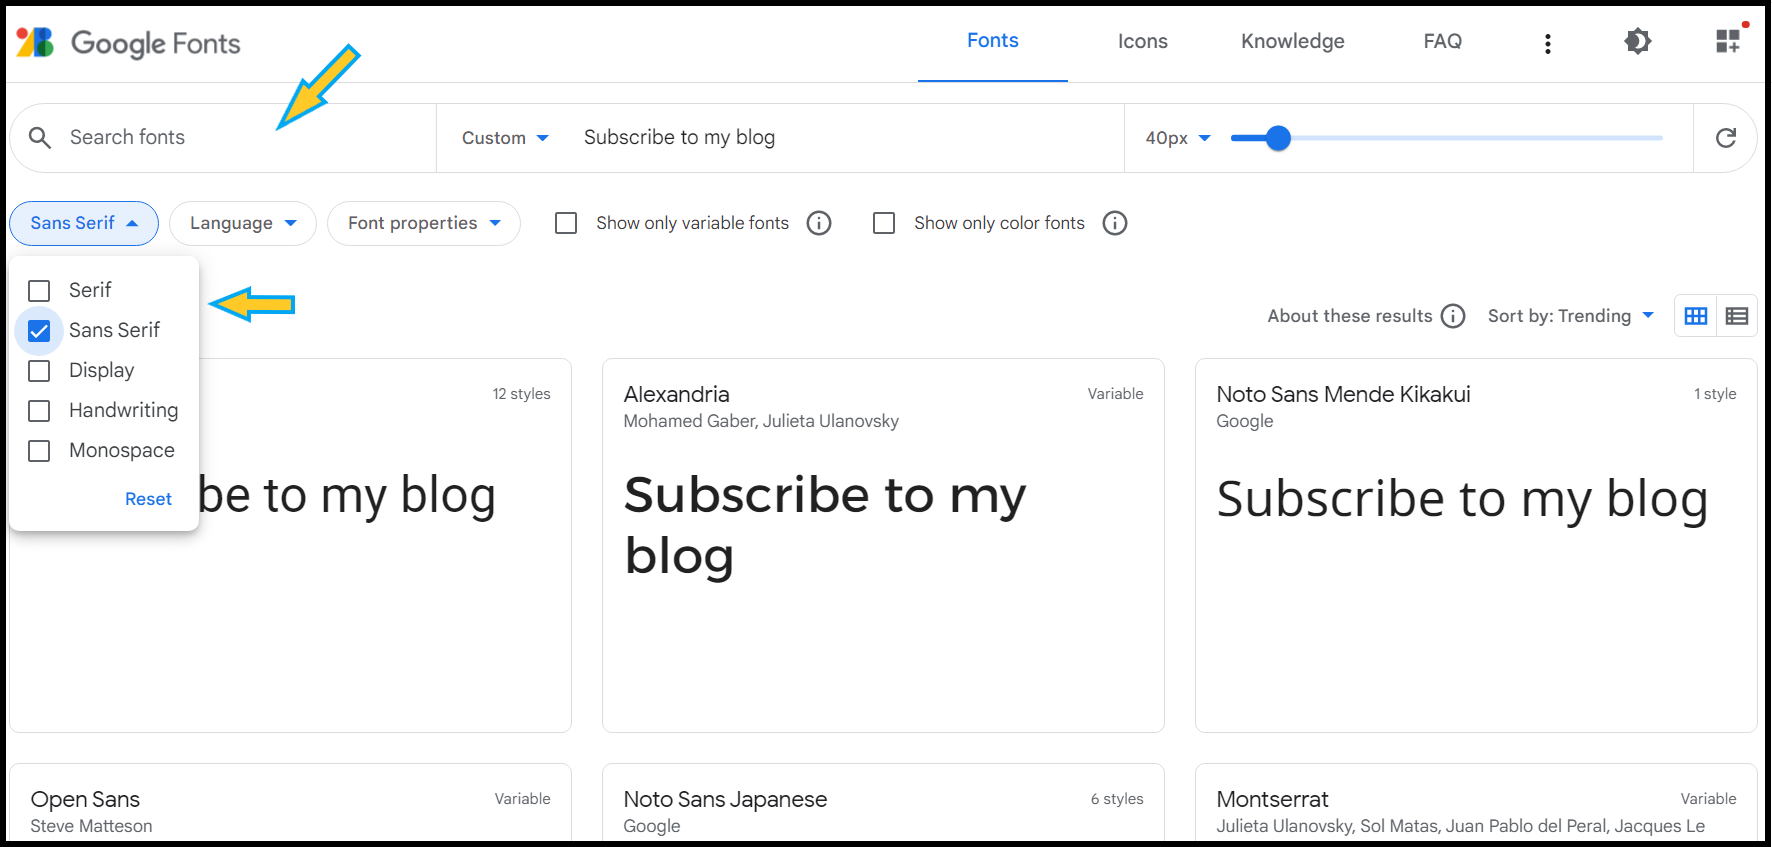
2. From here, if you have a particular font family you can use the search feature or if you have a particular typeface you want you can use the categories dropdown to select it.
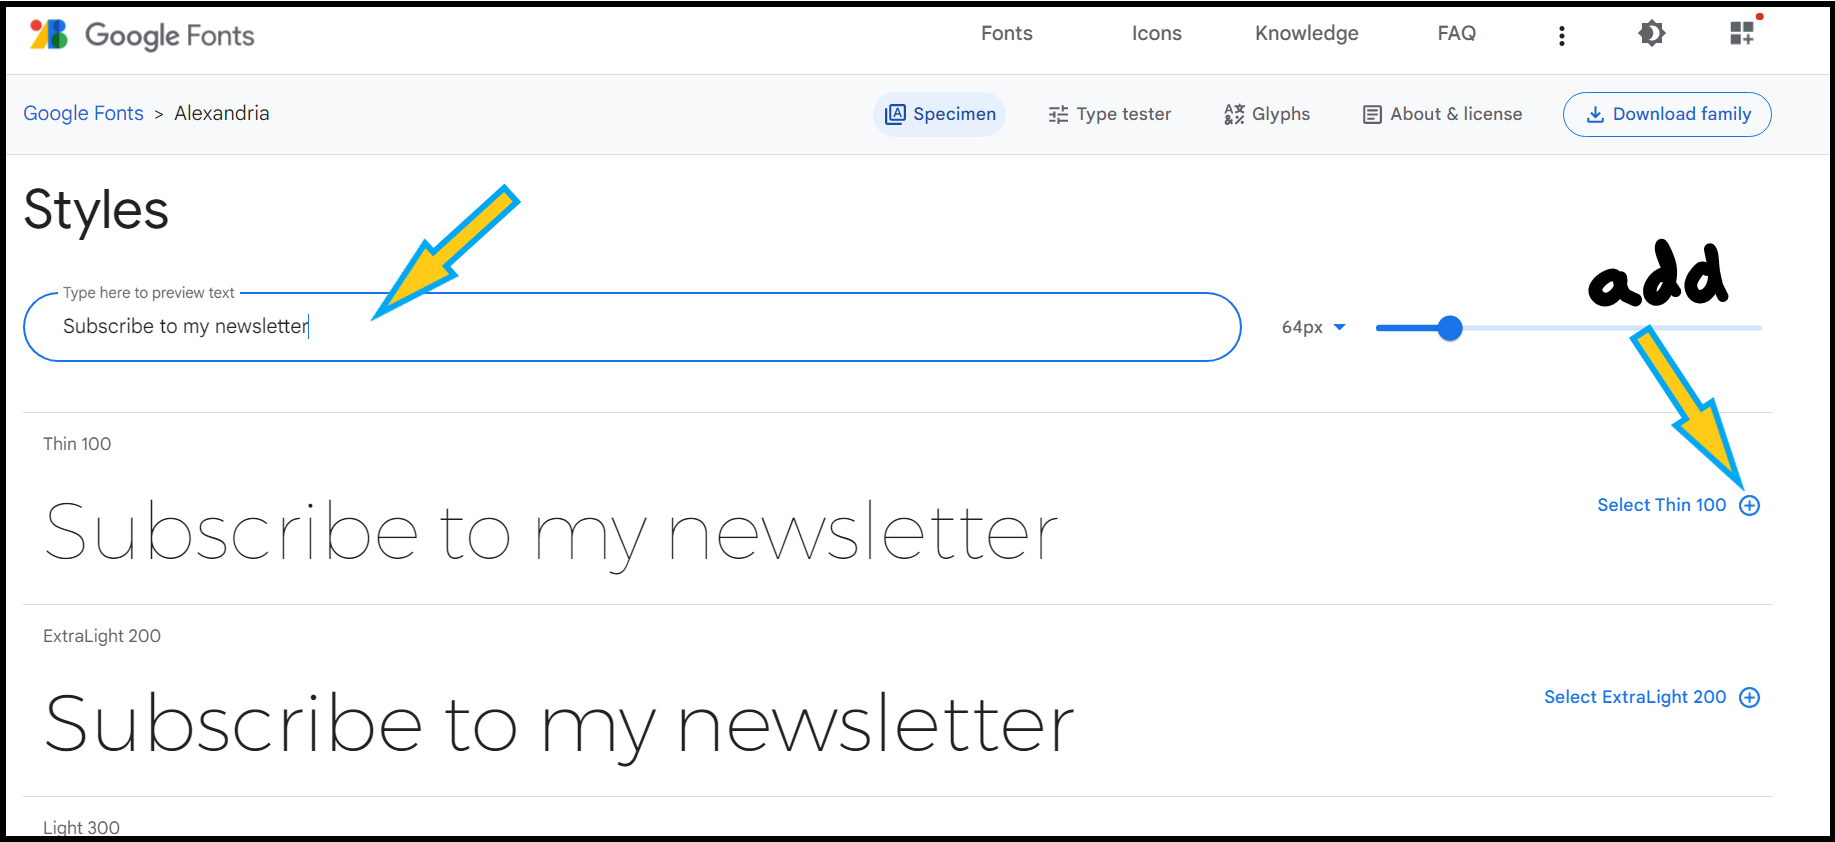
3. Then you click on the font family you want and can now begin selecting the font weights you need. To assist you in picking the font that looks best for your design, you can customize the text to include a text of your choice and tweak the size with the font size slider. (In the example I picked the font Alexandria, and customized the text to remind you to subscribe to my newsletter, yes I have one. I also picked the thin 100, light 300, and black 900 weights.)
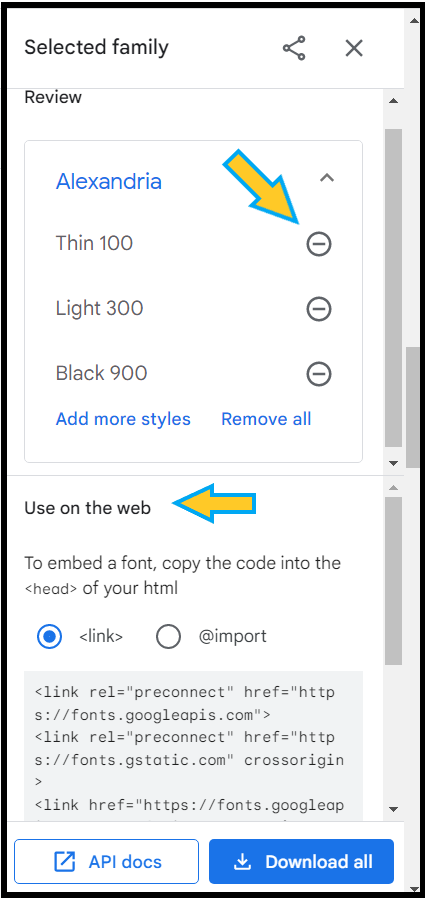
After selecting the weights, and font families you want, click on the, view selected families icon on the top right.
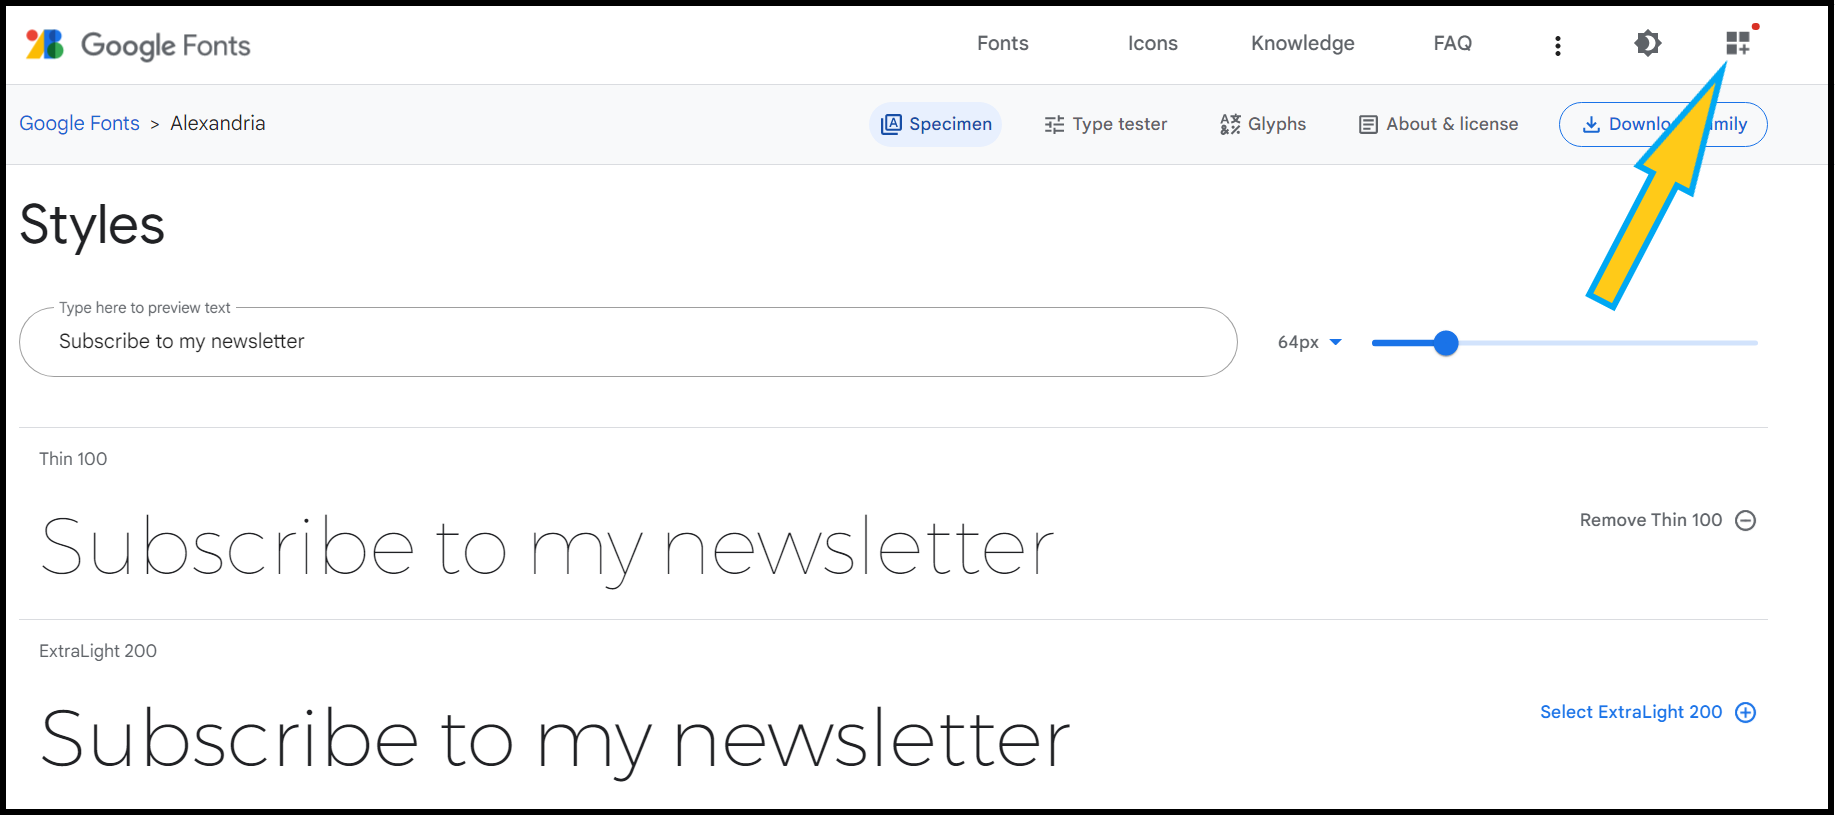
The side menu below will slide in.

4. This is what you've been waiting for. On this side menu, you can review the font families and weights you chose and remove the ones you no longer need. And below that, you can see the, Use on the web section, this is the part we're interested in.
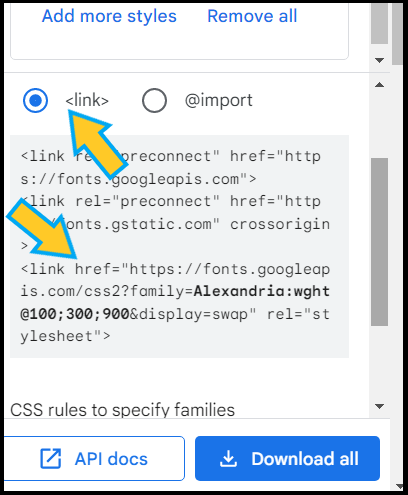
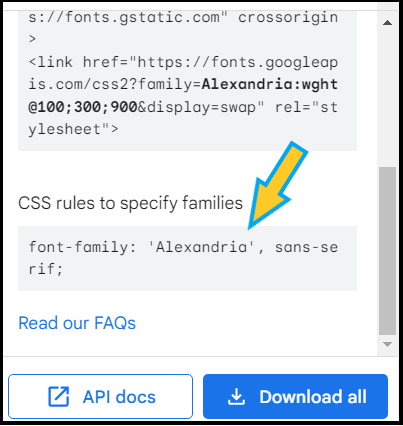
5. So now, to link the font you want to your HTML click the <link> radio button as indicated and copy and paste the stylesheet link tag and its contents to the head tag of your HTML. It'll be the last one. Then copy and paste the CSS rules to the CSS selector in your stylesheet file.
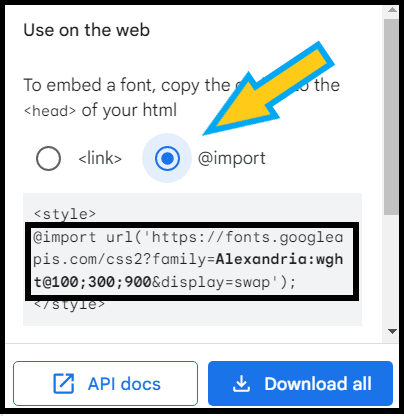
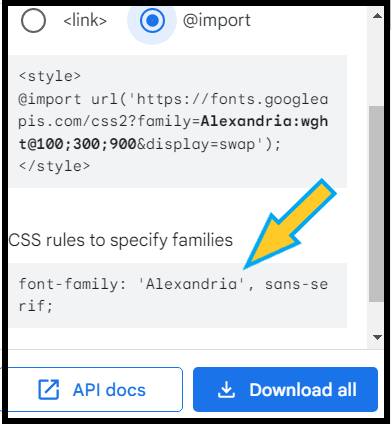
6. To link the fonts to your CSS you will select the @import radio button and copy and paste the code to the top of your CSS file. (Preferably you can copy it to your HTML between your style tag in your head tag.) But as you know that's not the best way to link your CSS.
You will then copy the CSS rules to the selectors you want.
And that's it. You can now refresh your website and see the changes.
Before I finish it's important to note that for most use cases using the link tag is preferred and even faster, since the @import defers loading until the resource linked is fetched. This brings about the scenario where "a flash of unstyled text" is shown when the website is loading.
If you find this article enjoyable and helpful, you subscribe to my newsletter, Just in Time, it's free and I can send you more nuggets of wisdom like this. It'll help support my work and continue to publish well-curated posts. Thank you!